This is a little spring wreath that I made last year. Although I did this project as a guest post, I realized that I never posted it on my own blog, so I'm sharing it with you today. I did this as a teacher for an online class, so it's a little wordy in the instructions, but there's a good tip or two included.
The emphasis here is little! This wreath measures only 6" across. Somehow, to me, that just makes it sweeter. So, lets gather our supplies and make this in less than an hour!
Supply List:
1 small grapevine wreath
1 bunch of wire flowers/buds
wire cutters
mushroom bird
floral wire
ribbon
beads in complimentary colors
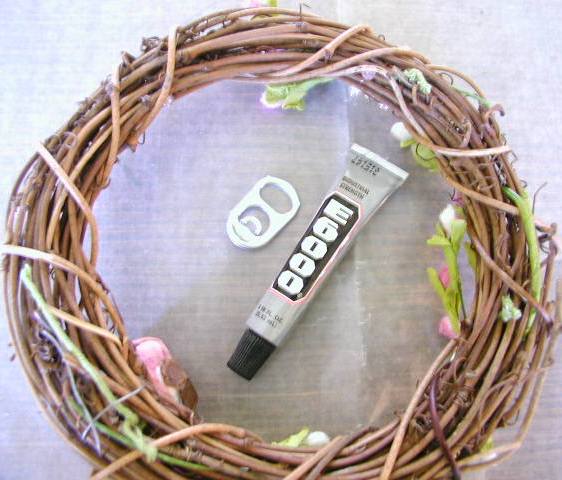
pop can tab ring
tacky glue/E-6000 adhesive
Before we begin, let me just say a word about the grapevine wreath I used. It came as 2 wreaths fastened together, but I really didn't want the double thickness, so I just clipped them apart. (Now I have a spare!)
If you would rather use a big wreath, a foam form or some other type of base, go right ahead! I just liked the size and texture of these mini grapevine wreaths.
Now, on to our project.
Using your wire cutters snip the floral stems so that they are about the size to go half way around your wreath. (If they are short or sparse, you may want to use more than one, like I did.) While you have your wire cutters out, go head and clip a piece of floral wire into about 3" pieces.
Wire your floral stems to your wreath using the floral wire to anchor them securely, twisting at the back of your wreath. Now is the time to add that little mushroom bird so that you can define what is the top and bottom of your wreath. If your bird comes on a wire, like mine did, then just use that wire to fasten it to your wreath. If not, use some Tacky Glue and give it 10 minutes to dry.
This next step is actually my favorite part. We're going to glue some beads onto our wreath in a semi-random way. I like to put my beads on a paper plate and my Tacky Glue on a piece of waxed paper that is NOT on the plate. (You don't want all of your beads to roll into the glue.....ask me how I know this.) I use a toothpick, dip it in the glue and then just touch it onto the bead. You really do just need a dot.
In some places, I glued 3 beads close together so they kind of looked like berries. Other places, I just put the bead on singly, sometimes tucking them in between the vines to give some depth to the whole wreath as you can see in this picture:
Let the glued on beads dry for about 10 minutes (the #1 reason I love Tacky Glue....it dries really fast!) and then make a little bow out of your ribbon and glue it on at the bottom near the bird.
I put a little sparkly gem in the center of my ribbon. You could add a button or a bead, or nothing at all if you choose. I just like a little sparkle that does not involve glitter!
To make a super easy hanger, use a pop can tab/ring. I used E-6000 adhesive (it works great on metal) and fastened the pop tab to the back of my wreath:
Let dry about 10 minutes. Cut a piece of ribbon to your desired length and run it through the tab and either glue the ends together or tie it, whichever you choose.
There you have it... a cute mini spring wreath that won't take up too much space on your wall.
Linking up to any or all of the fine parties listed at the bottom of this page as well as HERE and.....


This is so adorable, Danni! And I like that it is so small ;-)
ReplyDeleteBeautiful, Danni! Spring is going to be here soon I hope...and this wreath makes me want to have it here asap. :)
ReplyDeleteThis is a sweet, adorable wreath! And it shouts "Danni" all over!
ReplyDeleteCute! I made a funkywreath for the back door out of green foil garland and a vintage metal sand shovel. I love it, but it's not allowed on the front door. THe front door has standards.
ReplyDeleteOh, how pretty! -Marci @ Stone Cottage Adventures
ReplyDeleteOh Danni that is really cute. I'm glad ou reposted
ReplyDeleteWhat a beautiful wreath Danni - is that one of the birds ( you had a bag of them, from your MIL, right? )
ReplyDeleteDid you spray paint it?
XXX
Perfect little touch!
ReplyDeleteHee, I'm sorry to hear 'bout the little glue incident, but the wreath came out darling!
ReplyDeleteBeautiful wreath, Danni! It's perfect for Spring time :)
ReplyDeleteHugs,
Stephanie
Beads separate from glue. Got it. Love it Danni!
ReplyDeleteYou are becoming the Queen of inexpensive, fun, cute crafts!
ReplyDeleteI'm with Carlene...you are the Queen of Quafting!
ReplyDeleteI think you need to do several and hang them on the backs of your chairs for Easter - this is too cute! Do not tell me it is something else now.
ReplyDeleteBeautiful. What a gorgeous wreath. Makes me wish Spring really were here.
ReplyDeleteThis is such a sweet wreath Danni! Makes me think that spring is actually going to arrive here someday. Love the little birdie!!
ReplyDeleteSo pretty! I need to make a spring wreath. I have some of this stuff on hand... So much to do, so little time :-/
ReplyDeleteBeautiful!!!
ReplyDeleteI kind of did the same thing with all my cake sprinkles getting in the icing before it was time. Live and learn...Anywho, it's beautiful, Springy, love the bird. Still wish I had your eye for crafts...still looking at my cheese box.
ReplyDeleteSuper cute wreath! It is definitely perfect for spring!
ReplyDeleteSo cute, Danni - I LOVE grapevine wreaths!!! :)
ReplyDeleteOmg so cute Danni. I love how little it is
ReplyDeleteBeautiful Wreath. Thanks so much for sharing with Wednesday's Adorned From Above Blog Hop. Have a great week.
ReplyDeleteDebi, Charly, Marci, and Suzan
http://www.adornedfromabove.com
Pretty! I love grapevine wreaths. The little bird is just too cute! Thanks for sharing this with us on the Spring Craft Blog Hop. Pinned and Tweeted!
ReplyDeleteBeautiful!! I love when things like this are simple and not overdone. They look so much better and really add some snap to your home! #SCBH2015
ReplyDelete