Thursday, August 21, 2014

My Favorite Halloween Projects

Halloween is my favorite holiday by far.  I have way more Halloween decorations than I do Christmas.  This year, I'm not sure if I'll get around to making anything for Halloween or not as I'm right in the middle of some major landscaping projects, but I thought I'd share my favorite past creations with you.  Just click on the link below the picture for directions for any of these projects.
This Umbrella Witch was so easy....
Umbrella Witch
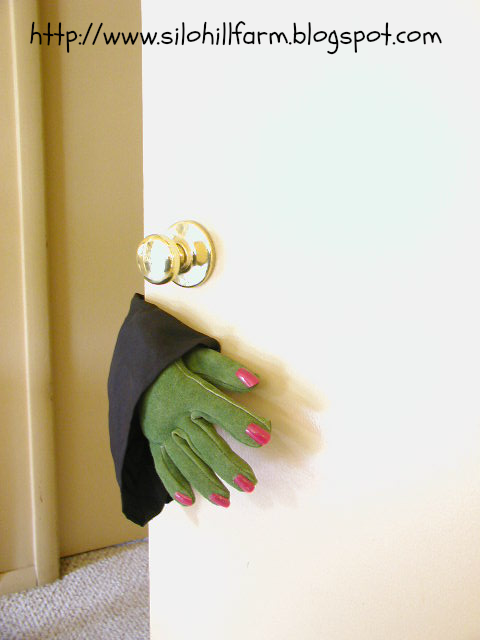
My Witch Hand is one of my most viewed projects and I made it in 30 minutes....
Witch Hand
Skullduggery?  Exactly what is it?  
Skullduggery
I hope you found a little inspiration to get you rolling for this Halloween season and I hope I find time to do a project or two.

Tuesday, August 19, 2014

CILANTRO LIME HERB BUTTER

I love butter, there is no denying it.  I'm a girl who likes to have her baked potato with tons of butter....possibly even to the point of buoyancy.  A hot dinner roll doesn't have enough butter unless that first bite sends some running down my chin.  Yeah.  Well, I'm having to be a little more health conscious these days and the days of lakes and rivers of butter are pretty much over for me.  I can still have it, just in moderation.  So...I've been enjoying some herb butters that give just a little bit of butter a big punch of flavor.
My latest favorite is this Cilantro Lime Herb Butter.  It's delicious on corn on the cob, black beans, rice or warm tortillas and I imagine many other things, but those are what I've tried it on so far.  Don't you just love those little pats of butter set out on a table?  Perfect portion control for me, but also just a little on the elegant side.
This was so easy.  All I did was soften a stick of butter, add a couple of tablespoons of freshly squeezed lime juice and about 3 tablespoons of chopped fresh cilantro.  I used a small whisk to make sure it was mixed well.  Then I used a little spatula to smoosh it into a couple of flexible ice cube trays ($1 from the dollar store).
It's a little messy, but just wipe the edges clean and stick it in the fridge for a day to let the flavors blend.  
You can just pop them right out and into a ziploc bag and store them in the freezer....
or, you can put them out on a tray on your dinner table and impress your guests....
 I had a little left over, so I filled a couple of those little salad dressing containers that you get from a restaurant (yes, I wash them and save them *sigh*).  They hold just enough to add to a dish of rice or a pan of black beans.  Yummmmm.
If you want to try another amazing herb butter, check out this mouth-watering wonderfulness from my friend Maureen over at It's All Connected.  It's a Gourmet Herb Butter for Steak and I can testify that it will take your steaks up a level or three.  Just try it.
Gourmet Herb Butter for Steak
I can tell you that there will be plenty of grilling going on this week because we are looking at possible triple digit temps and that pretty much means I'm not turning on the oven.  I will however be spending plenty of time out in said heat, because this is happening at my house right now....
We'll be putting in some french drains, spreading all of that gravel, and then pouring a concrete patio and adding some gravel walkways to our back yard.  Okay...we'll be having the patio poured, but we'll be doing the rest....outside...in triple digit temperatures....and then we'll have steak on the grill, with herb butter....and lots of iced tea.   
Thank you Maureen for letting me link to you and your recipe today!


Monday, August 11, 2014

The Blog Train Tour.....

All aboard?  Maybe  not, but let me tell you I have found some fun new blogs on the whole blog tour train!  I had seen a few post about it and then I got a wonderful email from the fabulous Virginia at Artsy VaVa inviting me to climb aboard.  I was pretty excited because back when I first started blogging, let me tell you, I was seeing her blog featured everywhere and I was always amazed at her projects. 
I fell in love with this simple project.....
Tin Tile Tree
Her beautiful pictures and great sense of humor in this post about the Blarney Stone, made me feel like I was right there in Ireland with her!  (I always wanted to try this...until I read her post about why I shouldn't! Check it out....)
Don't Kiss the Blarney Stone
Since Halloween is coming right up (oh yes it is!), let me show you won of my favorite posts over at Artsy VaVa.  Can you guess what these are made of?  This is just one example of her awesome jewelry, but you'll find more at her blog!
A Pair Of Pumpkin Pendants
One of her more recent project that just blew me away were these four cable spool projects, because I have some cable spools.
4 DIY Cable Spool Projects
When it comes to furniture, Virginia's Peacock Chair is just awesome!
The Peacock Chair
So head on over to Artsy VaVa and get yourself some inspiration because there is plenty of it to be found there!
As for the 4 blog train questions I'm supposed to answer now....
1). What am I working on right now?
Well, since we bought a house last December and spent the entire spring renovating it, I'm working on making some of my own decor for it.  This weeks project is for my coastal-inspired bedroom.
I'm planning on using it with this wreath that I made...
Beach Wreath
2) How does my work differ from others in it's genre?
I'd love to be able to answer this question, but it's a hard one and I'm not sure mine differs that greatly.  I just like to put my own spin on whatever I'm making and make it fit my own ecclectic style and decor.  For instance, I love all of the pallet projects out there in blog land, so when I needed a shelf in my living room one fall, I made a pallet shelf that I could customize in a few different ways...
Pallet Shelf
Right now it looks like this....
I guess making decor that is multifunctional would be my style.

3.) Why do I write/create what I do?
This may be the easiest question of all and I'll answer it backwards. I create the things I create because either a) I can't find exactly what I want in a store, or b) because it's too expensive when I do or c) I just think I can do it better than what I find in stores.  As for the writing part....well, I think it's the same for most of us bloggers...we are proud of what we make and we want to talk about it a little and to be honest...not everyone in our everyday life cares to hear all about what we did with our paint or hot-glue gun today. LOL!  But, in the blog world, we find a ton of like-minded people who are interested in the process and happy to learn a few tips and tricks or pick up a little inspiration.  I also think they (meaning YOU) appreciate the process and realize what it takes to create.  Most people walk in my house and say, "Oh I love this! Where did you buy it?"  My blogs friends see something in the background of a photo and email and ask, "Did you make that?"  Big difference, eh?
4) How does my creative process work? 
Another easy question... I either need something, want something or am inspired by something one of you make and then try to figure out if I can make it using stuff I already have.  Sometimes I can do it, and sometimes it requires a trip to town (which I don't love doing) but most of the time I have what I need or I can make what I have work.  I have a lot and I mean a lot, of crafting supplies because I spent a lot of years living in a cabin on a mountain in Montana where the winters are long and cold and you'd better find something to do to keep from going crazy!  

And that is the end of my blog train post.  And I do mean the end...as in the caboose, because sadly, I had a terrible time finding anyone who hadn't already done this blog train, or because school was starting up they didn't want to make a commitment.  I had a few who wanted to do it and one got really sick and the other had a family emergency and had to back out at the last minute.  I also had some wonderful friends who, even though they had already done it, said they would do it again, but I couldn't make them do that.  So....if you are reading this and want to help keep this train running, hit me up and I'll tell you how it goes, there's still plenty of time!!  
Thank you again Virginia at Artsy VaVa, for inviting me along and I'm sorry that I ended up being the caboose of this train.  (At least for now....until one of my blog friends says they'll take a fun ride!)


Thursday, August 7, 2014

Guest Bedroom

I know I'm slow to post pics of my new house renovation, but I'm catching up a room at a time.  If you come visit me, you'll probably sleep here......
This is the room that the Golden Child occupies at least once a week, but if you follow his simple rules, he'll be happy to share it with you.  (I'll share those rules at the end of this post, just in case you are considering a stay.)
Doing a bedroom that makes a 6 year old boy happy and at the same time is elegant enough for guests was kind of a challenge.  Jacob wanted the walls to be red.  It was one of the few times in his life I had to say "no".  I just couldn't do it. The bed is queen-size and sucks up a lot of space, so I wanted white walls to help make it look a little roomier.  The walls are a solid white and it took a lot of work to make them smooth and pretty, but when I turn on the light, this happens..... 
I love the shadows that the ceiling fan lights cast in this room.
I tried to swipe those globes for my living room, but Jacob said, "NO WAY"!  He loves them too.  
You may remember this fleur-de-lis tile I made when we lived in the old house.  It found a perfect home in this room.
FLEUR-DE-LIS TILE
Also, you'll notice in the top picture, we had to add this little plaque to scare away any ghosties, because sleeping in a new room can be a little scary when you're 6.  Sam's grandmother had an embroidered frame with this saying on it....
Don't you love it??!  I read it to him before he goes to bed and he giggles. 
My bedspread and shams came from Overstock.com.  I bought them for myself for my birthday, and then didn't want to put them on my bed until we moved.  Then Sam decided he had to have a king-sized bed, so the queen sized bed moved into the guest room and the color scheme of black and white was driven by that.  Which is better than the hot pink color that was in this room when we bought it.....
This little table and step stool have some special meaning to me.
The table top is a piece from the mantel at our first house in Montana, which was our first renovation project ever...demoing a fireplace wall was a serious first project.  The step stool on top of it has 3 little drawers in it.  I picked it up at a little shop in the French Quarter of St. Charles, Missouri when I went on an overnight shopping extravaganza with my good friend Ciree.  It was 4 degrees that day and we had the town to ourselves.  A word about that lamp....I'm workin on it.  I've had 2 craft fails with it and barely got it presentable for use as of right now.  After 2 fails, I'm taking a break from it.  *sigh*
The little sign above the lamp is one of my all-time favorite quotes...
Jacob needed a place to hang his important stuff, like his favorite denim jacket, his whistle, his sunglasses, his headlamp (for night time trips to the loo) and his favorite PEZ ball cap. 
He won't let me tell you what he keeps in the little drawers, but I'll just say that one of them holds a magic key.
And of course, he has to have a place to put his "Big Stuff"....
This cube shelf from Target worked perfectly to hold all of those toys you can't play with (see rules - think Legos) as well as his books, crayons and games.  He put the things on the top shelf himself....
His polar bear, that he doesn't sleep with because "the wormie and the polar bear don't like each other", the boxes in the middle, well again, secret boy stuff, and of course his boxing gloves.  He's a serious boxer....
All of those treasures on the top shelf are crowned by a picture of his daddy, my son William.
Well that's a pretty good tour of the guest bedroom and if you are thinking you might want to come visit, please review Jacobs rules for sleeping in his room.  (He made these up for Suzan from Simply Vintageous.... by Suzan, because SHE is his girlfriend.)
As for the wormie.....be gentle if you choose it because he's been in Jacobs life since he was born. (It's way softer than the squiddy.)


Tuesday, August 5, 2014

SEA SHELL DISPLAY STANDS

I have seen some awesome shell display stands for sale and I always think they are so pretty.  Pretty...but expensive.  The more I looked at them, the more I decided they were unnecessarily expensive.  You know me.....I decided to make my own.
 This was just too easy and it took me about an hour, including painting and cost under $5.00 to make all three.  I had a few wooden pieces in different shapes.  They come like this at your craft store....
I gathered some of my favorite shells, along with the wooden shapes and some wooden dowel rods.
I cut the dowel rods to the desired lengths and fit them into the stands.  Then I just poked the shells on top to see how they looked and adjusted accordingly.
Seemed just right to me, so I hit them with some of my favorite spray and primer in one.
I did not glue the dowel rods in, nor did I glue the shells on top.  (I might want to change them out from time to time.)
Pretty, don't you think?  
I found this one online for $30.49 and it's not even a real shell. Hmmm.....


So, if you have something pretty you want to display or maybe even a collection of prettiness that needs more focus, give these a try.  Way too easy and perfect for my ocean themed master bedroom.
Oh...and that gorgeous beachy water color was painted for me by my talented and dear friend Judy.  In fact she painted two pictures for my master bedroom.  There is nothing that woman cannot do!
Thank you Judy!
Linking up here:


Friday, August 1, 2014

BERRY CRUMBLES.....DESSERT IN 20 MINUTES!

Today, I'm sharing my secret weapon for an awesome and easy dessert. 

I am a berry hoarder.  I never turn down berries when someone offers them and I've been known to pick 8 gallons of blueberries in a morning.  My freezer is mostly full of fruit.  I'm terrified that next March may come and I won't have berries for muffins or worse yet....I'll have to buy them from the store.  
I'm not a pie maker.  Can't make a decent pie crust to save my life, but.....I can make the most wonderful fruit crumbles in a flash because I make a ton of crumble topping and put it in the freezer....in between all of the raspberries, blueberries, peaches and blackberries.  You won't believe how easy this is.
Crumble Topping
(makes 8 single serve desserts)
1 3/4 C. flour             1/2 C. light brown sugar
1 1/2 tsp. cinnamon   1/2 tsp. coarse salt
15 tablespoons cold butter
Throw everything in a bowl and use a pastry cutter (your fingers, a fork or 2 knives works just as well) to blend it all until small lumps form.
At this point, you can either use it or freeze it in a container until you need it......or want it.
Anytime you want dessert, it's only 20 minutes away from this point.  All you do is lightly oil (I use cooking spray) some ramekins, custard cups, oven-safe bowls or, you can just make one big dessert in a pan...it's all the same process.  Throw the fruit (fresh or frozen) in your prepared dish and sprinkle a little sugar on top to make it juicy. (No need to thaw the fruit or the topping.)
Now pile some of that yummy, crumbly topping right on top.  (We use lots!)
Bake it in the oven 20 minutes or until it's brown and bubbly.
Let it cool down a bit and enjoy!  Better yet....throw a scoop of ice cream on top....you know you want to!
I cannot tell you how fast, easy, tasty and impressive this simple dessert is.  Well, I guess I can, because I just did.  Anyway, I have never had this fail and again, I never say "no" to berries....or peaches...or apples.