Monday, December 15, 2014

A TRIO OF TREES

Even though I am taking a hiatus from my own blog, today, I am over at the fabulous Suzan's blog Simply Vintageous....by Suzan sharing a little holiday project. 
Actually.....3 of them.  A trifecta.  A "Hat Trick"...she's Canadian after all.
You can check it out by clicking HERE or on the picture below.
http://suzyq-vintagous.blogspot.com/
Really, don't you want to know about a naughty little black lace tree?

Wednesday, November 26, 2014

WHIMSICAL THANKSGIVING PUMPKIN

You know those crazy whimsical pumpkin stems that you see at Halloween?  I'm going to show you how to make one on a pretty fabric covered Thanksgiving pumpkin.  It's easier than you'd think.
I did this project for a guest post over at Distressed Donna Down Home.  Come check it out by clicking HERE.


Tuesday, November 25, 2014

ELEGANT THANKSGIVING PUMPKIN

I have been on a very long hiatus from blogging, but that does not mean I have not been crafting, or stalking a few blogs every now and then.  I've actually been giving my blog a lot of thought lately and one of the things I'm thinking about is only doing guest posts.  Weird, I know.  Anyway....I'm doing a guest post today for my dear friend Donna at Distressed Donna Down Home because when I mentioned only doing guest posts....she jumped right on it!  (And because I love her...seriously, she's like a sister to me.)
Anyway, I'm sharing a little last minute easy Thanksgiving project on her blog today, so click here or on the picture itself and I'll show you what I'm up to.
Elegant Thanksgiving Pumpkin

Wednesday, September 17, 2014

Some Down Time....

I've decide to enjoy some down time for awhile, so I'm taking a break from blogging.  A break from writing posts, from reading posts and from facebook.  In fact, I chose to deactivate my facebook account for the time being.  I will miss everyone, but I'm looking forward to getting some other things done that I have been putting off.  I'm also looking forward to fall...and the upcoming holidays.  I will reevaluate in the New Year.  In the meantime...
it's been a lovely ride!
 

Monday, September 15, 2014

CHARMED

Today I have the good fortune of being a guest over at Amy's blog, Stow and Tell U.  Stop over and check out these cute charms I made out of something you probably see all of the time and never really took notice of.
You can check them out by clicking HERE.  While you are there, spend some time cruising Amy's blog because she has some wonderful projects that are so inspiring.  Let me just show you a few of my faves....
Decoupage Paint Stick Magnets
Raw Hide Faux Leather Storage Boxes
So head on over and get to know Amy if you don't already!

Saturday, September 13, 2014

I'M IN THE SPOTLIGHT!

A lot of crazy things have been happening to me lately.  Not necessarily fun things either.  Like right now, this is how my house looks.....
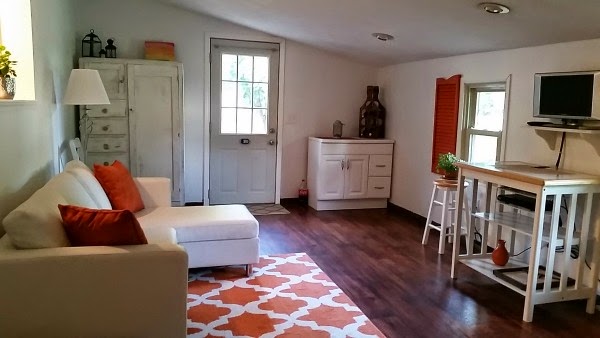
I am thankful that my new floors that failed are getting replaced, but this kind of stuff just freaks me out!  I mean there has been a couch in my kitchen for a week and it's making me crazy.  My usually calm and serene family room where I like to relax and used to look like this....
http://silohillfarm.blogspot.com/2014/07/family-room.html
....looks like this right now....
which is mostly my craft room stuff along with my dining table.  Arghhhh!!  I'm feeling very twitchy.
But....there is a ray of sunshine in this week's craziness.  Today I am featured in the Spotlight over at Junk Chic Cottage.  Yep, Kris  has asked me to join in the fun at the "Life Behind the Blogger" series and thank goodness, because it will take my mind off of the chaos that is surrounding me right now!  So, if you want to know some of my history and life other than blogging, head on over to Junk Chic Cottage and while you're there, poke around Kris's wonderful blog for a while.  You can get there by clicking HERE, or the box below. 

I'm turning my comments off for this post.  I'm hopefully going to be busy putting my house back together this weekend.  Hope yours is a lovely one!

Tuesday, September 9, 2014

DREAM SIGN

This post is all about making a dream out of a disaster.
Lovely isn't it?  It wasn't always so.  It was born from a disaster.  
I had this fun little cabinet.  I got it at an antique store on sale for $20.00 and it really wasn't that great, but I fell in love with the door on it and used it for years.
I decided to use it in my new coastal themed bedroom, but it was going to have to be prettied up a little first.  I painted it with Annie Sloan Old Ochre Chalk Paint.  Two coats.  It was beautiful.  I gave it two coats of Miss Mustard Seed Clear Wax.  It was gorgeous.  I was buffing out the last coat when my table broke and the whole cabinet came crashing down onto my concrete garage floor.  That beautiful door broke.
I said a lot of swears.  Sam felt bad enough for me that he tried to fix it with some Gorilla Glue and clamps.
I was fearful that it wouldn't hold up to the pulling that a cabinet door would get.  I decided to touch up the damaged paint on the rest of the cabinet and use it without the door.  I couldn't toss the door though because I loved it so.  I decided to make a little sign out of it and maybe something to hang my robe and jammies on.
I had this metal sign that said "Dream" and I wired it onto the front.
I also had this awesome metal seahorse pull that I was going to use on the door anyway, but it was "chippy" and I wanted it bright and clean.  I gave it a coat of spray paint.


So began the bones of this new project.


I taped the edges and gave the border a quick coat of Annie Sloan "Provence".
 Then, I just left it out and stared at it for about 2 weeks.  I tried several things and settled on some beach glass, shells, starfish and glass stones - all attached with my trusty finger-burnin' hot glue gun.
I added a few hooks....in the wrong place, which led to adding a few more shells.  Finally, I was pretty happy with it and mounted it to my walk-in closet door.
I did salvage the rest of that cabinet, but that's a different post coming soon to a computer screen near you.
In the mean time, I'm enjoying my new robe hook/sign.  
Kind of goes with my beachy wreath don't ya think?
I have had a lot of fun making decor for my master bedroom...maybe too much fun.  As soon as I get the mate to my nightstand and paint it, I'll show you the rest.  In the mean time...I'm packing up my craft room and moving everything out of it because I'm getting all of my flooring replaced, except the kitchen.  That's right...all of that beautiful coastal cypress that was installed less than 5 months ago has to be replaced.  Installation failure.  Glad we had professionals do it because I would not want to have to fight that fight with the company myself.  So....replacement won't cost me anything, but can I just tell you what a pain in the butt packing everything up and moving it out is?  It seems like I just did that!  (Oh yeah....it's because I did.)  I know...first world problem, but still.  I can tell you that some swears were said over that issue as well. (My swear jar overfloweth.) Hope it ends as well as my cabinet door disaster.

Linking up to:
center> Photobucket


The Dedicated House

Monday, September 1, 2014

I'M A PINK LADY TODAY....

That's right, I'm a Pink Lady today and that is something I have never said before.  However, when Tuula asked me to do a guest post for her "Think Pink" series, I couldn't say "no".  
I did a little reverse painting tutorial, but it's not this one....
 
Nope...the theme is pink, so head on over to The Thrifty Rebel and see what I made.  I'll even teach you how to make one to suit your own decor...pink or otherwise.

Thursday, August 21, 2014

My Favorite Halloween Projects

Halloween is my favorite holiday by far.  I have way more Halloween decorations than I do Christmas.  This year, I'm not sure if I'll get around to making anything for Halloween or not as I'm right in the middle of some major landscaping projects, but I thought I'd share my favorite past creations with you.  Just click on the link below the picture for directions for any of these projects.
This Umbrella Witch was so easy....
Umbrella Witch
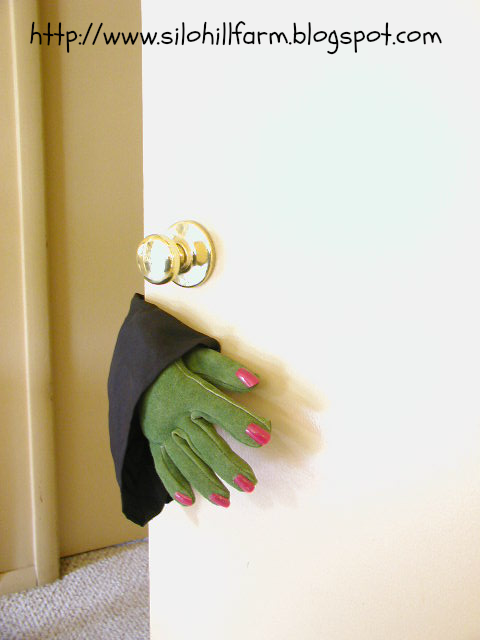
My Witch Hand is one of my most viewed projects and I made it in 30 minutes....
Witch Hand
Skullduggery?  Exactly what is it?  
Skullduggery
I hope you found a little inspiration to get you rolling for this Halloween season and I hope I find time to do a project or two.

Tuesday, August 19, 2014

CILANTRO LIME HERB BUTTER

I love butter, there is no denying it.  I'm a girl who likes to have her baked potato with tons of butter....possibly even to the point of buoyancy.  A hot dinner roll doesn't have enough butter unless that first bite sends some running down my chin.  Yeah.  Well, I'm having to be a little more health conscious these days and the days of lakes and rivers of butter are pretty much over for me.  I can still have it, just in moderation.  So...I've been enjoying some herb butters that give just a little bit of butter a big punch of flavor.
My latest favorite is this Cilantro Lime Herb Butter.  It's delicious on corn on the cob, black beans, rice or warm tortillas and I imagine many other things, but those are what I've tried it on so far.  Don't you just love those little pats of butter set out on a table?  Perfect portion control for me, but also just a little on the elegant side.
This was so easy.  All I did was soften a stick of butter, add a couple of tablespoons of freshly squeezed lime juice and about 3 tablespoons of chopped fresh cilantro.  I used a small whisk to make sure it was mixed well.  Then I used a little spatula to smoosh it into a couple of flexible ice cube trays ($1 from the dollar store).
It's a little messy, but just wipe the edges clean and stick it in the fridge for a day to let the flavors blend.  
You can just pop them right out and into a ziploc bag and store them in the freezer....
or, you can put them out on a tray on your dinner table and impress your guests....
 I had a little left over, so I filled a couple of those little salad dressing containers that you get from a restaurant (yes, I wash them and save them *sigh*).  They hold just enough to add to a dish of rice or a pan of black beans.  Yummmmm.
If you want to try another amazing herb butter, check out this mouth-watering wonderfulness from my friend Maureen over at It's All Connected.  It's a Gourmet Herb Butter for Steak and I can testify that it will take your steaks up a level or three.  Just try it.
Gourmet Herb Butter for Steak
I can tell you that there will be plenty of grilling going on this week because we are looking at possible triple digit temps and that pretty much means I'm not turning on the oven.  I will however be spending plenty of time out in said heat, because this is happening at my house right now....
We'll be putting in some french drains, spreading all of that gravel, and then pouring a concrete patio and adding some gravel walkways to our back yard.  Okay...we'll be having the patio poured, but we'll be doing the rest....outside...in triple digit temperatures....and then we'll have steak on the grill, with herb butter....and lots of iced tea.   
Thank you Maureen for letting me link to you and your recipe today!


Monday, August 11, 2014

The Blog Train Tour.....

All aboard?  Maybe  not, but let me tell you I have found some fun new blogs on the whole blog tour train!  I had seen a few post about it and then I got a wonderful email from the fabulous Virginia at Artsy VaVa inviting me to climb aboard.  I was pretty excited because back when I first started blogging, let me tell you, I was seeing her blog featured everywhere and I was always amazed at her projects. 
I fell in love with this simple project.....
Tin Tile Tree
Her beautiful pictures and great sense of humor in this post about the Blarney Stone, made me feel like I was right there in Ireland with her!  (I always wanted to try this...until I read her post about why I shouldn't! Check it out....)
Don't Kiss the Blarney Stone
Since Halloween is coming right up (oh yes it is!), let me show you won of my favorite posts over at Artsy VaVa.  Can you guess what these are made of?  This is just one example of her awesome jewelry, but you'll find more at her blog!
A Pair Of Pumpkin Pendants
One of her more recent project that just blew me away were these four cable spool projects, because I have some cable spools.
4 DIY Cable Spool Projects
When it comes to furniture, Virginia's Peacock Chair is just awesome!
The Peacock Chair
So head on over to Artsy VaVa and get yourself some inspiration because there is plenty of it to be found there!
As for the 4 blog train questions I'm supposed to answer now....
1). What am I working on right now?
Well, since we bought a house last December and spent the entire spring renovating it, I'm working on making some of my own decor for it.  This weeks project is for my coastal-inspired bedroom.
I'm planning on using it with this wreath that I made...
Beach Wreath
2) How does my work differ from others in it's genre?
I'd love to be able to answer this question, but it's a hard one and I'm not sure mine differs that greatly.  I just like to put my own spin on whatever I'm making and make it fit my own ecclectic style and decor.  For instance, I love all of the pallet projects out there in blog land, so when I needed a shelf in my living room one fall, I made a pallet shelf that I could customize in a few different ways...
Pallet Shelf
Right now it looks like this....
I guess making decor that is multifunctional would be my style.

3.) Why do I write/create what I do?
This may be the easiest question of all and I'll answer it backwards. I create the things I create because either a) I can't find exactly what I want in a store, or b) because it's too expensive when I do or c) I just think I can do it better than what I find in stores.  As for the writing part....well, I think it's the same for most of us bloggers...we are proud of what we make and we want to talk about it a little and to be honest...not everyone in our everyday life cares to hear all about what we did with our paint or hot-glue gun today. LOL!  But, in the blog world, we find a ton of like-minded people who are interested in the process and happy to learn a few tips and tricks or pick up a little inspiration.  I also think they (meaning YOU) appreciate the process and realize what it takes to create.  Most people walk in my house and say, "Oh I love this! Where did you buy it?"  My blogs friends see something in the background of a photo and email and ask, "Did you make that?"  Big difference, eh?
4) How does my creative process work? 
Another easy question... I either need something, want something or am inspired by something one of you make and then try to figure out if I can make it using stuff I already have.  Sometimes I can do it, and sometimes it requires a trip to town (which I don't love doing) but most of the time I have what I need or I can make what I have work.  I have a lot and I mean a lot, of crafting supplies because I spent a lot of years living in a cabin on a mountain in Montana where the winters are long and cold and you'd better find something to do to keep from going crazy!  

And that is the end of my blog train post.  And I do mean the end...as in the caboose, because sadly, I had a terrible time finding anyone who hadn't already done this blog train, or because school was starting up they didn't want to make a commitment.  I had a few who wanted to do it and one got really sick and the other had a family emergency and had to back out at the last minute.  I also had some wonderful friends who, even though they had already done it, said they would do it again, but I couldn't make them do that.  So....if you are reading this and want to help keep this train running, hit me up and I'll tell you how it goes, there's still plenty of time!!  
Thank you again Virginia at Artsy VaVa, for inviting me along and I'm sorry that I ended up being the caboose of this train.  (At least for now....until one of my blog friends says they'll take a fun ride!)